개발
이번에 사용해볼 라이브러리는 GoogleChrome의 lighthouse-ci이다.
1. CLI로 lighthouse 측정하기
-
lighthouse ci 라이브러리 설치 :
npm i -g @lhci/cli- Lighthouse CI를 CLI로 실행할 수 있는 명령어이다.
-
lighthouserc.js파일 구성module.exports = { ci: { upload: { target: 'temporary-public-storage', }, }, };- 더 많은 구성은 configuration에서 확인할 수 있다.
-
이 때, exports폴더가 존재해야 한다. Next.js의 경우, next.config.js를 다음과 같이 설정하여 만들 수 있다.
/** @type {import('next').NextConfig} */ const nextConfig = { output: "export", }; module.exports = nextConfig -
Lighthouse 측정 :
lhci autorun- 1번에서 설치한 lhci를 실행한다.
2. github actions로 Lighthouse CLI 자동화하기
// .github/workflows/ci.yml
name: Run Lighthouse CI
on: [push]
jobs:
  lhci:
    name: Lighthouse CI
    runs-on: ubuntu-latest
    steps:
      - name: Checkout
        uses: actions/checkout@v2

      - name: Use Node.js 18.20.2
        uses: actions/setup-node@v1
        with:
          node-version: 18.20.2

      - name: Install Packages
        run: |
          npm install

      - name: npm build
        run: npm run build

      - name: run Lighthouse CI
        run: |
          npm install -g @lhci/cli@0.3.x
          lhci autorun
위와 같이 .github/workflows아래에 .yml형식으로 작성해주면 된다.
step들은 다음과 같다.
uses: actions/checkout@v2: 레포를 체크아웃하는 checkout 액션을 사용한다.uses: actions/setup-node@v1: NodeJS를 설치하는 setup-node를 사용한다.npm i: package.json을 바탕으로 패키지를 설치한다.npm install -g @lhci/cli@0.3.x:@lhci/cli를 글로벌로 설치한다.lhci autorun: 4번에서 설치한 lhci를 이용하여 autorun을 실행한다.
3. comment로 기록하기
트러블 슈팅
1. npm install 과정에서 중지된다.

npm install 과정에서 계속 중단된다. action 스크립트에서 Install Packages와 이전 부분은 다음과 같다.
# lighthouse-ci.yml
name: Run Lighthouse CI
on: [push]
jobs:
  lhci:
    name: Lighthouse CI
    runs-on: ubuntu-latest
    steps:
      - name: Checkout
        uses: actions/checkout@v2

      - name: Use Node.js 18.20.2
        uses: actions/setup-node@v1
        with:
          node-version: 18.20.2

      - name: Install Packages
        run: |
          npm install
노드를 18.20.2버전으로 설정하고, npm install으로 패키지를 설치한다.
- 우선,
-—force옵션을 추가하여 해결을 했다.
2. Unable to connect to Chrome
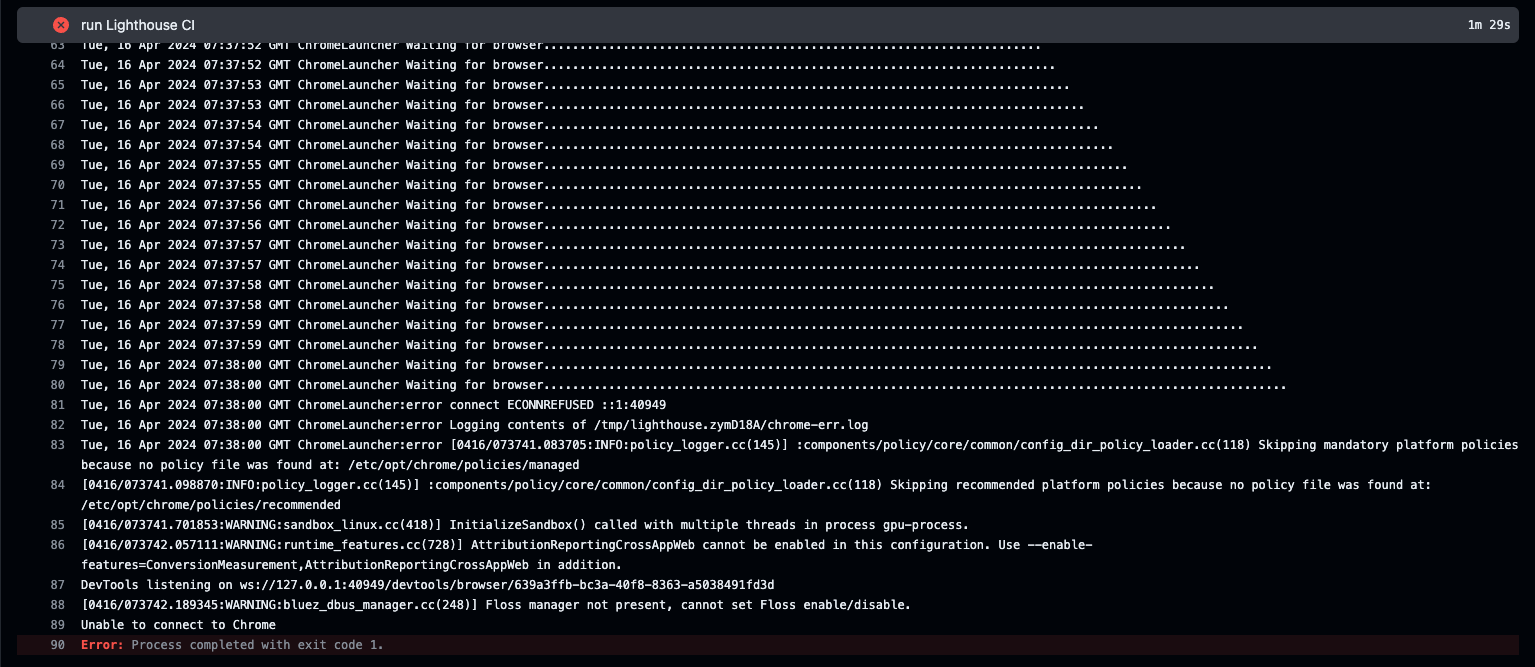
hostname을 127.0.0.1로 수정해도 에러가 발생한다.
- 관련 Issue
- : 미해결
- https://github.com/GoogleChrome/lighthouse-ci/issues/799 : 127.0.0.1로 수정하라고 추천
-
lighthouserc.js 수정
module.exports = {
  ci: {
    upload: {
      target: "temporary-public-storage",
    },
  },
};
공식문서에 나온 lighthouse.rc로 수정하여 해결했다.
3. […not-found] is missing “generateStaticParams()” so it cannot be used with “output: export” config.
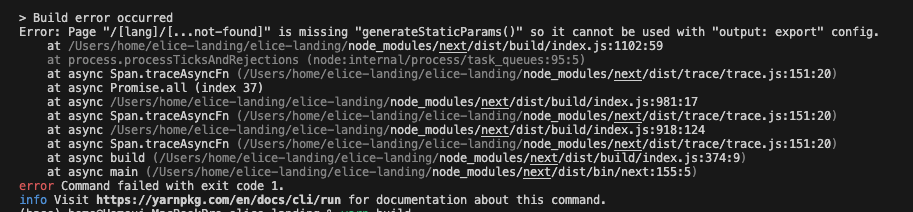
[…not-found]페이지는
generateStaticParams()를 빼먹고 있고,output:export설정과 함께 쓰일 수 없습니다.
로컬에서는, 직접 제거하고, github actions에서는 명령어를 통해 제거하도록 하였다.
rm -rf src/app/'[lang]'/'(theme)'/'(default)'/'[...not-found]'4. 메인 페이지밖에 측정이 되지 않는다.
build를 했을 때, 메인 페이지만 빌드가 된다.
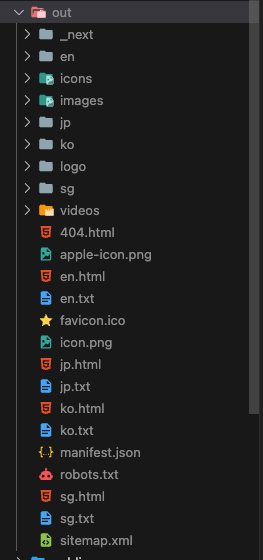
out폴더를 보면, 메인 페이지인 index.html만 존재한다.
우선, 이전에 작성했던 next.config.js의 output: ‘exports’ 옵션을 output: ‘standalone’ 으로 고친다. 그리고 lighthouserc.json을 다음과 같이 수정하였다.
{
  "ci": {
    "collect": {
      "startServerCommand": "yarn start",
      "startServerReadyPattern": "ready on",
      "numberOfRuns": 1,
      "settings": {
        "preset": "desktop"
      },
      "url": [
        "http://localhost:3000",
        "http://localhost:3000/ko/solutions/industries/new-material"
      ]
    },
    "upload": {
      "target": "temporary-public-storage"
    },
  }
}
lighthouse 측정을 원하는 페이지를 url 배열에 추가해준다.
Links
- kakao : PR comment로 수치까지
- lighthouse-ci github
- 매 커밋마다 / 변화가 생길 때마다 자동으로 lighthouse를 측정한다.
느낀 점
- 공식문서대로 우선 하고, 그 이후 안된다면 블로그를 보자. 절대 블로그 먼저 따라하지 말기